
Starting a strength-training journey is exciting, but most beginners get overwhelmed by the amount of advice online. Some jump straight into high-volume workouts they found on Instagram. Others copy advanced powerlifters and feel discouraged when progress stalls. After helping dozens of people—from students training in small basement gyms to remote workers lifting with simple home setups—I keep returning to the same principle:
Strength is built on mastering a few essential movements. Not 20. Not 12. Four.
Whether you’re lifting with a barbell at a commercial gym, using adjustable dumbbells at home, or training at a minimalist garage setup, the foundation remains the same.
This guide breaks down the four essential lifts every beginner should learn, how to progress safely, what mistakes to avoid, and how to build a simple strength plan that actually works.
Why These Four Lifts?
There are hundreds of exercises, but the lifts below have one thing in common:
They train the most muscle more efficiently.
- Squat – Lower body strength, mobility, core stability
- Deadlift – Posterior chain power and real-world strength
- Bench Press – Upper-body pushing power
- Row or Pull-Up – Upper-body pulling balance
If you walked into any strength-focused gym—CrossFit boxes, powerlifting gyms, or sports performance centers—you’d see these movements everywhere.
These lifts create the fastest and safest long-term progress for beginners.
Lift #1 — The Squat
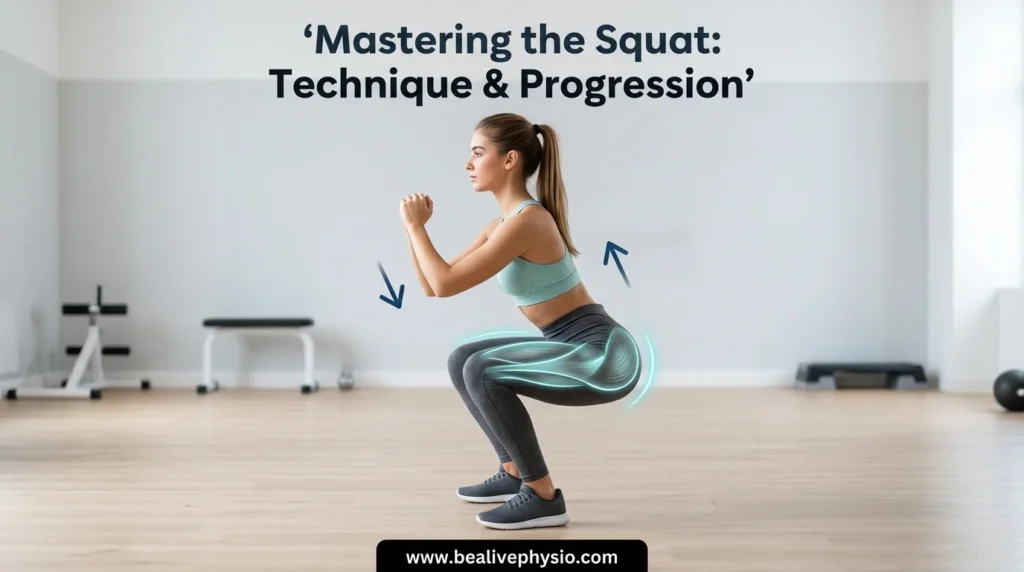
Most people think squats are “just a leg exercise,” but anyone who has done them properly knows they train almost everything: quads, hamstrings, lower back, core, and even ankle mobility.
How to Perform a Strong, Safe Squat
Step-by-step guide:
- Stand with feet shoulder-width apart.
- Keep toes slightly pointed outward (~15 degrees).
- Brace your core (as if about to get lightly punched).
- Sit your hips back and down—don’t drop straight down.
- Keep your knees tracking over your toes.
- Hit parallel or as close as your mobility allows.
- Drive through your mid-foot and heel to stand tall.
You can practice this using a chair behind you or holding onto a pole for support—simple but effective learning tools.
Progression Options
You don’t need a barbell on day one.
Start with what you have:
- Bodyweight squat → 3×10
- Goblet squat with a dumbbell/kettlebell → 3×8
- Front squat (barbell) → 3×5
- Back squat (barbell) → 3×5
If you’re training at home with limited weights, simply increase difficulty by:
- slowing the tempo
- Adding a pause at the bottom
- using a backpack filled with books
- Progressing to Bulgarian split squats
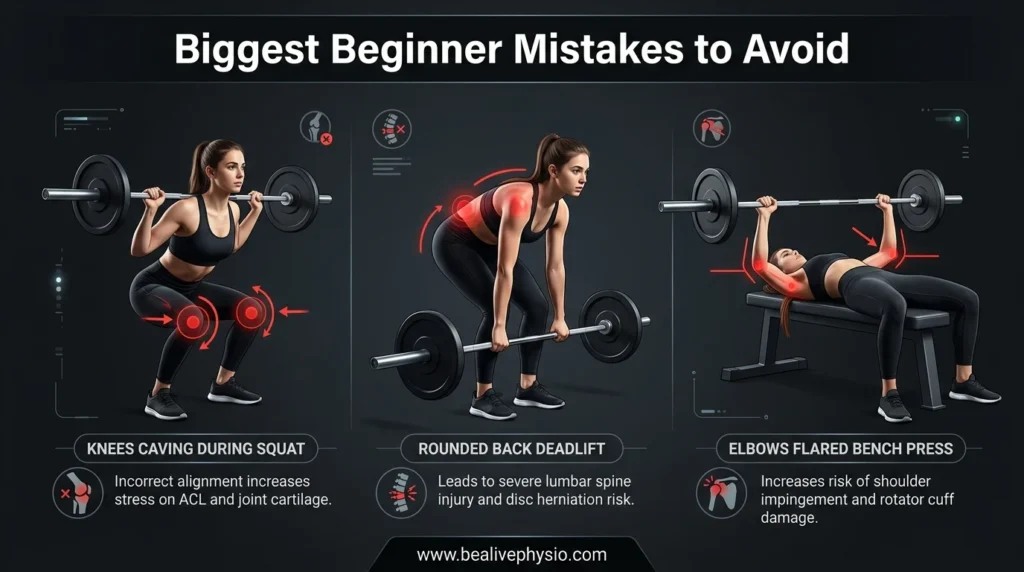
Common Beginner Mistakes
- Letting the knees cave inward: Fix by pushing them slightly outward.
- Heels lifting off the ground: Usually caused by poor ankle mobility.
- Going too heavy too fast: Leads to form collapse.
Beginners often tell me “squats hurt my knees,” but when I check their form, it’s usually a combination of collapsing knees and poor bracing.
Lift #2 — The Deadlift

If there’s one lift that translates most directly to real life—lifting boxes, picking up kids, moving furniture—it’s the deadlift.
It’s also the lift where beginners make the biggest mistakes because it looks easy.
How to Deadlift Correctly
Here’s the simplest way I teach it:
- Walk to the bar — it should be over your mid-foot.
- Hinge at the hips (not squat).
- Grab the bar shoulder-width apart.
- Bend your knees slightly until your shins touch the bar.
- Squeeze your armpits down (like holding oranges).
- Drive your feet into the ground and stand tall.
- Keep the bar close to your legs.
If you don’t have a barbell, a single heavy dumbbell between your feet works well for beginners.
Progression Options
- Dumbbell deadlift
- Kettlebell deadlift
- Trap-bar deadlift (easiest to learn)
- Barbell Romanian deadlift
- Conventional or sumo barbell deadlift
Trap-bar deadlifts are fantastic for office workers with tight hips.
Common Mistakes
- Rounding of the lower back (usually caused by poor bracing)
- Bar too far from the body (increases stress on the lower back)
- Treating it like a squat—hips need to start higher
A good cue I give to beginners:
“Hips back, chest proud, drag the bar up your shins.”
Lift #3 — The Bench Press
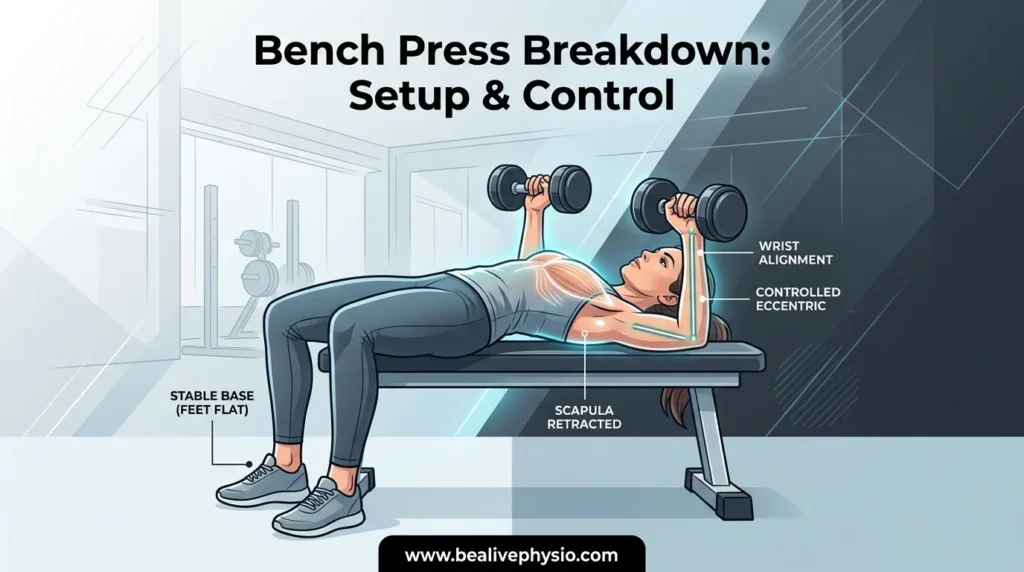
People love bench day until progress stalls. The bench press rewards patience, technique, and control more than brute strength.
Proper Bench Setup
- Lie on the bench with your eyes under the bar.
- Pull your shoulder blades back and down (like squeezing them into your back pockets).
- Keep your feet planted firmly.
- Lower the bar to your mid-chest.
- Press in a straight, controlled path.
Beginner Progression
If you’re training at home:
- Start with push-ups
- Move to incline push-ups
- Use the dumbbell bench press
- Transition to barbell bench press
Push-ups build surprising chest and triceps strength when done with a proper full range of motion.
Mistakes to Avoid
- Flaring elbows too wide
- Lifting hips off the bench
- Bouncing the bar off the chest
- Gripping too wide or too narrow
A trick that helped one of my beginner clients:
Imagine bending the bar in half as you lower it—that engages the back muscles you need for stability.
Lift #4 — The Row (or Pull-Up)
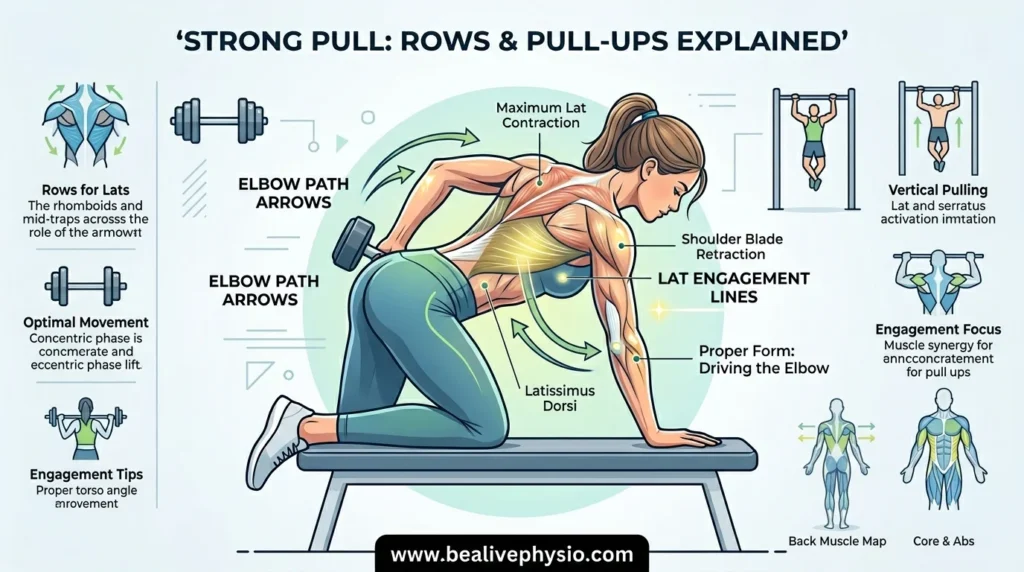
You can’t build a strong upper body without pulling strength. Rows balance out pressing movements, protect the shoulders, and build real back thickness.
Row Options
- Dumbbell rows
- Barbell bent-over rows
- Inverted rows
- Seated cable rows
- Machine rows
If your goal is pull-ups:
Start with assisted pull-ups or use a resistance band looped over a bar.
Progression Path
- Inverted rows
- Dumbbell rows
- Assisted pull-ups
- Pull-ups
- Weighted pull-ups
Common Mistakes
- Using too much momentum
- Shrugging instead of pulling with the back
- Short range of motion
- Pulling the bar too high
For rows, I teach the cue:
“Pull your elbow toward your hip.”
How to Build a Beginner Strength Plan (Simple & Effective)
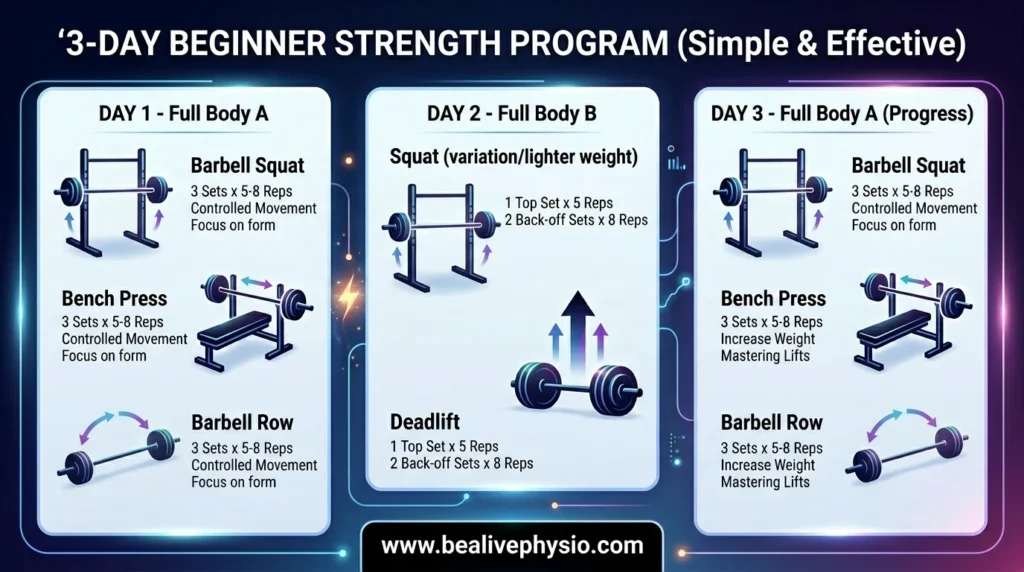
Here’s a template I’ve used with complete beginners for years.
3-Day Strength Program
Day 1 — Squat Focus
- Back squat: 3×5
- Dumbbell row: 3×10
- Romanian deadlift: 3×8
- Plank: 3×30 sec
Day 2 — Deadlift Focus
- Deadlift: 3×5
- Bench press: 3×5
- Lunges: 3×10 per leg
- Lat pulldown or assisted pull-up: 3×8
Day 3 — Bench + Row Focus
- Bench press (or push-ups): 3×5
- Barbell row or dumbbell row: 3×10
- Goblet squat: 3×12
- Farmer carry: 3×30 steps
How to Progress Weekly
Use the simplest rule:
If you hit all reps with good form → add 2.5–5 kg next session.
If you’re training at home with limited equipment:
- increase reps
- slow the tempo
- Add paused reps
- Add single-leg variations
Slow, consistent progress beats dramatic jumps every time.
Real Mistakes Beginners Make (I’ve Seen Them All)
1. Lifting too heavy, too soon
Ego is the enemy of progress. I once had a client increase his deadlift by 20 kg in one session—he felt great that day, then couldn’t walk properly for a week.
2. Changing programs every two weeks
Strength requires repetition. Stick to a plan for at least 8–12 weeks.
3. Skipping warm-ups
A simple routine—leg swings, hip hinges, band pull-aparts—prevents so many injuries.
4. Overtraining small muscles
New lifters love bicep curls and tricep pushdowns. They help, but they shouldn’t be the main course.
5. Poor sleep and inconsistent nutrition
Strength comes from recovery, not just training.
Tools & Devices That Help Beginners

These aren’t mandatory, but they help tremendously:
- Adjustable dumbbells (Bowflex, Yes4All, OR simple spin-lock dumbbells)
- Resistance bands (great for home pull-up support)
- Lifting belt (after 3–4 months of training)
- Chalk (improves grip instantly)
- Free tracking apps like Strong, AlphaProgression, or Google Sheets
You don’t need fancy equipment. You need consistency.
Frequently Asked Questions (FAQs)
Most beginners feel stronger in 2–3 weeks and see noticeable strength gains in 6–8 weeks.
Yes. If you lack equipment, swap barbell lifts with dumbbell or kettlebell variations.
Use bodyweight progressions:
1-Push-ups
2-Split squats
3-Hip hinges
4-Inverted rows under a study table
Not every set. Stop 1–2 reps before failure to keep technique safe.
Warm up properly, progress slowly, and pay attention to technique before adding weight.
Final Thought
Strength training doesn’t require complicated programming or special genetics. What matters is mastering the basics, progressing steadily, and staying consistent long enough for the results to show. The four essential lifts—squat, deadlift, bench, and row—are the backbone of almost every successful beginner program I’ve ever coached. Start with manageable weights, learn proper form, and build upward patiently. Your future, stronger self will thank you.